Free Shipping On All Orders Over $75
| Lower 48
Free Shipping On All Orders Over $75
| Lower 48
One of the biggest fears for any new kayak angler is what if I capsize! “how stable is this fishing kayak?” After being assured that the kayak is stable by either the salesperson, your own research or through a test paddle, you throw down the cash, load it up on the roof and drive off with plans of your first adventure front of mind.
Stability to one person is quite different to another but we’re not here in this blog to discuss kayak stability, hopefully through test paddles, experience, and consultation with your tribe you have made the right kayak choice for your needs. We are here in this blog to help you plan for the unexpected event of a capsize.
Practice getting back on – sometimes the confidence to know you can will help avoid capsize
Before you load up and head off for you first kayak fishing adventure leave the gear at home and in a controlled environment flip the kayak and practice the process of getting back on with the least fuss and stress on you. Below is a guide that will help you with this process. You may not master this in one session so make time in your life to practice as often is manageable and seek advice from local experts if you are struggling to master it.
It is also highly advisable once you feel confident in the basics of simply righting the kayak and getting back on that you then go ahead and try that very same process dressed as you would on a kayak fishing trip which includes your lifejacket or PFD (if it is inflatable then sacrifice a gas tube for the exercise and inflate it, you will discover this changes the process a lot).
If you approach every trip assuming you will capsize then you will have steps in place to protect you both from gear loss and keep yourself safe. These steps include all of the below
This experience only weeks ago shared with us by Tony of NSW Australia is a great example of how things can go wrong very quickly regardless of good planning. Tony attributes his rescue to the simple and very important purchase decision made months earlier when he invested in the RAILBLAZA Visibility Kit, without it, Tony was in very real danger of exhaustion and hypothermia.
Tony had done most things right, he was dressed appropriately for the very cold mid-winter conditions, leashed all items to his kayak, someone knew where he was going and when to expect him, he had his visibility kit and mobile phone for communication…yet things turned very bad the moment he capsized and entered the freezing cold waters, as you will see in the video below captured on his GoPro. Tony wanted us to share this with you in the hope that through this at least one other person is motivated to take safety more seriously, you can never be too prepared!
Tony launched on his local freshwater dam late afternoon, mid-winter in overcast conditions with light rain and low cloud cover. As a precaution, he made sure the nav light was on before launching, whether it was intentional or an accident, he set the strobe mode rather than one of the solid white light modes.
After getting to his spot and setting anchor Tony set about fishing from his 3m fishing kayak and it was the simple act of putting his rod into the rod holder behind him that caused him to lose balance, capsizing into the icy cold waters of the dam. After the initial shock of the cold water, Tony gets himself sorted flipping the kayak back over, sorts out some of the gear in the way of the seat which was all leashed, then attempts to get back on.
It’s at this point Tony fails two attempts to get back on the kayak and understandably a little bit of panic starts to set in. He has been treading water fully clothed and is now feeling the effects of the water temperature. Tony activates his inflatable life jacket which as it turns out was not tight enough around the waist so rides up too high which will now be a hindrance to any attempt to get back on the kayak and also blocking his view.
Tony decides at this point a better course of action is to swim the kayak to the closest bank which was not too far away…in his panic Tony has forgotten the kayak was anchored and will spend the next 10-15mins exhausting himself trying to swim the kayak in freezing cold water. A bit of shock, low light and the fact his inflatable life jacket was hindering his view meant Tony could not identify he was not actually getting any closer to the bank.
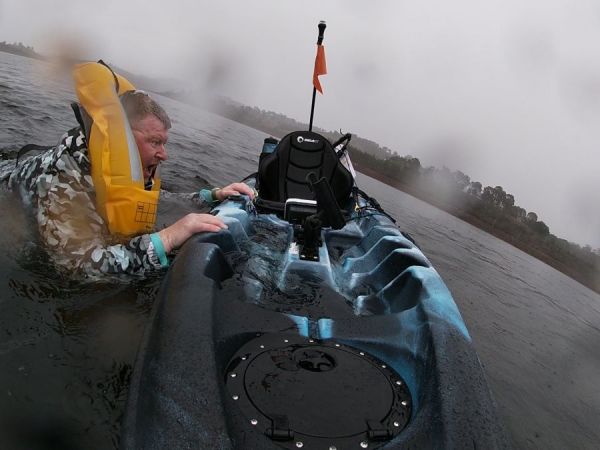
After many panicked screams for help in the hope that someone might hear him, which was a low chance given the time of day and the conditions meant very few people were out, a lonely angler in his tinny was heading back to the boat ramp before dark and spotted the kayak, from his point of view it was just a kayak on the dam which was not unusual, however, the strobing light created enough of a concern to make him get close enough under electric motor power to see Tony alongside the kayak waving for help.
Tony was picked up and taken to the boat ramp where he called for an ambulance who treated him for hypothermia, Tony was told that 10 more minutes in that freezing water and its unlikely he would have survived the cold.
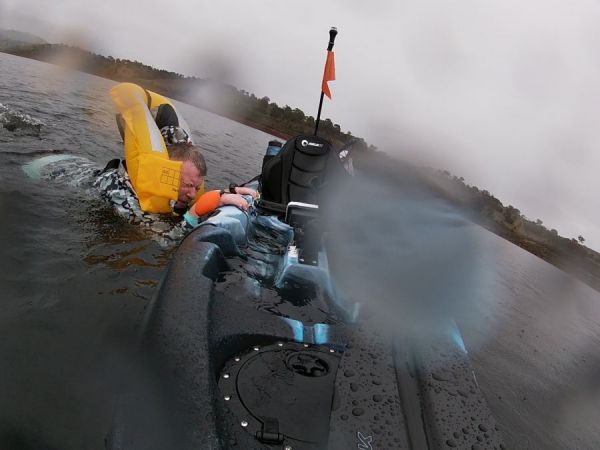
Tony believes if it were not for the fact that he invested in a quality nav light like the Visibility Kit, he would not be here today. If there’s one thing Tony would like us all to take from his experience it is that never take safety lightly, plan for the worst-case scenario, hope you never need it but if you do you will be glad you invested in reliable safety equipment and followed your safety plan.
The Railblaza Visibility Kit II is a must-have safety item in the kit of any kayak angler, or recreational paddler. In one convenient, value-for-money pack you get everything you need for your kayak or canoe to be seen on the water day and night.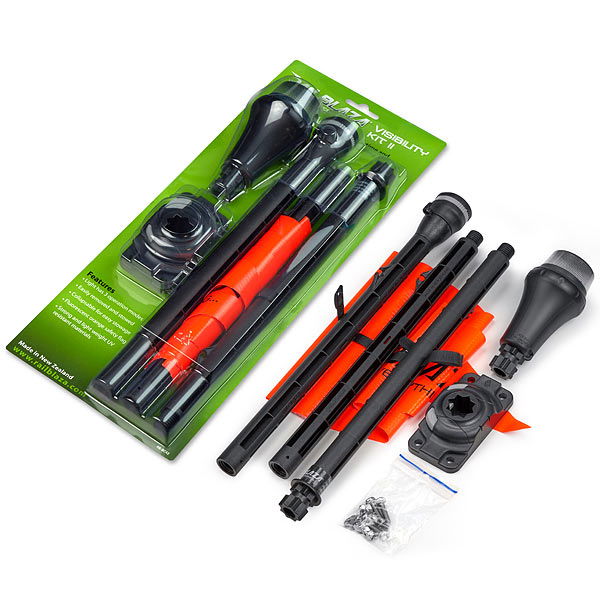
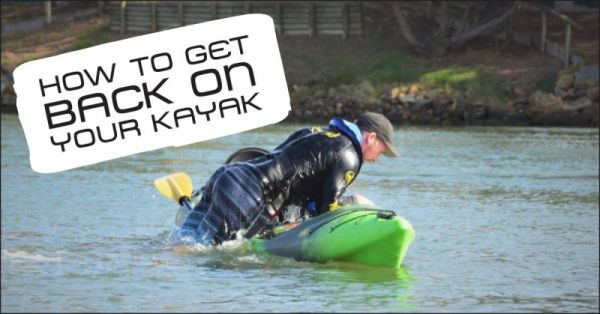
Guide by pro team member and experienced kayak angler Jason Milne
“How to get back on your kayak?” is a question I get asked all the time by first-time kayak buyers. This guide is a brief run through how to get back on your kayak if you fall off. Anyone can do this and all you need is practice.
If your kayak is upside down these are the steps to take to right it, there are 2 ways you can do this.
With either technique, to avoid tangles and injury make sure all leashes, ropes fishing hooks etc are identified and out of the way before you attempt to right the kayak.
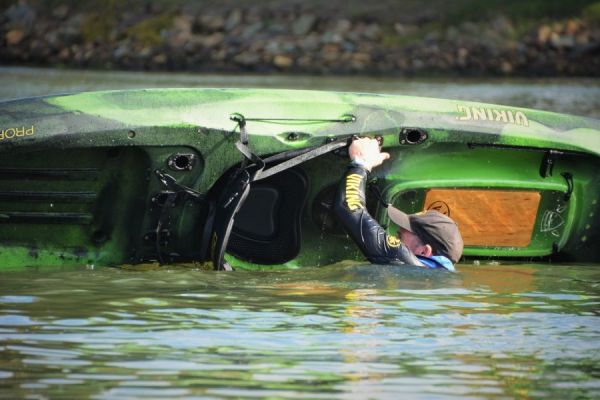 The push-pull technique simply means you get to the centre of the kayak reach under the kayak to grab the opposite side handle Put your other hand on the handle closest to you then pull the opposite side handle while pushing the handle closest to you which will flip the kayak. Then clear the deck of any other clutter and get ready to get back on.
(if your kayak has no handles then use the grab line or seat strap, if none of these then use the Bodyweight option instead).
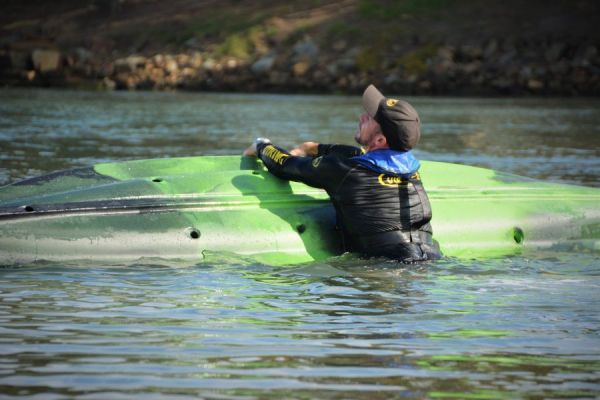
This technique is best used for wider kayaks, heavier kayaks and those with no way to grab a handle from underneath. Position yourself close to the centre of the kayak, kick your feet out behind you so you’re floating like using a kickboard in a pool. Then kick as hard as you can pulling yourself onto the kayak reaching as far over the other side as possible. Grab hold then lean back letting your body weight and momentum right the kayak as you fall back.
If the kayak is very wide just move closer to either end where it starts to narrow until you feel you are at a point where you can get over the kayak to pull it over.
TIP – if you can’t grab the other side of the kayak then reach for a scupper hole and grab from there which will help grip it to roll it back
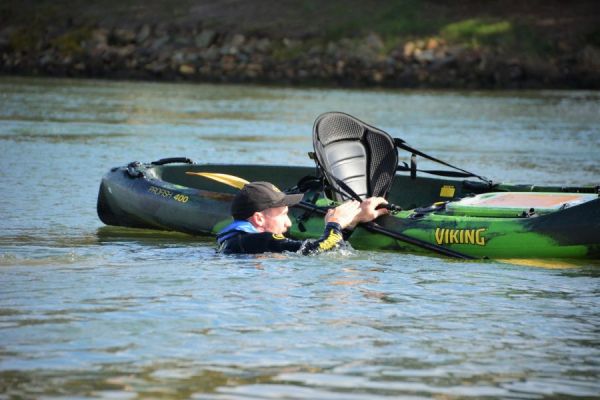
Once righted clear the lines and any other clutter and get ready to get back on
Position yourself close to the center of the kayak, kick your feet out behind you so your floating like using a kickboard in a pool. Reach over the side of the kayak and kick at the same time pulling yourself onto the kayak so your lying stomach down over the seat position then pause in this position.
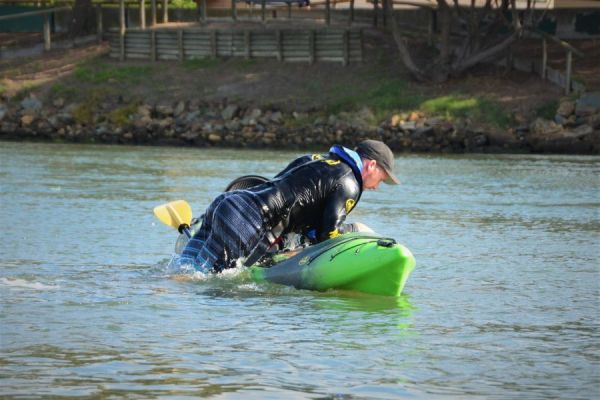
Keeping your body position low turn in the seat so you’re now sitting side-saddle with feet in the water. At this point, you can decide whether you’re comfortable bringing your legs into the cockpit one leg at a time or just relax and gain your composure.
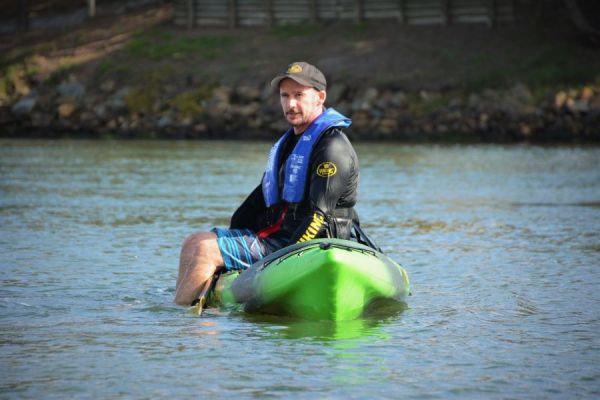
Practice practice and practice again, do it with your life jacket on as this will affect the ability to get back on. If you’re finding it hard to get back on using this technique you may want to consider researching the use of a paddle float for assisted rescue as demonstrated in the video below.
